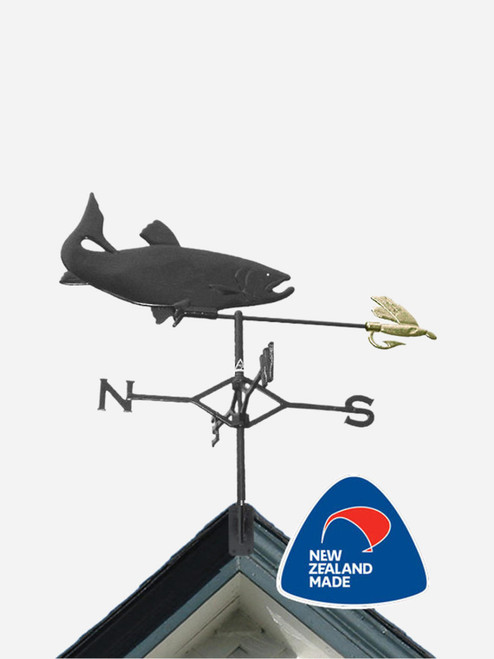
The Trout Weathervane is perfect for the fisherman, or just one of the most recognised weathervanes. It rounds of your spot with a perfect, hand crafted, look. Our premium quality weathervanes are an eye-catching and unique home or garden feature. This stunning Trout weathervane is handmade in New Zealand from sand-cast aluminium and brass, using traditional methods and powder coated in black for long-lasting colour.
All of our weathervanes have smooth running movement and a plate welded to the base stem for easy installation.
Trout weathervane dimensions:
- Overall Height: 900 mm
- Overall Length: 600 mm
- Shape Height: 220 mm
- Shape Length: 380 mm
- NSEW Length: 430 mm
Weathervane Installation Instructions:
1. Decide on a suitable open and prominent position to locate your weathervane.
2. Source suitable non-corrosive fixings - bolts or screws (depending on what you are fixing the weather vane to).
3. Find the ideal position for the bottom plate, screw/bolt in one screw/bolt (not tight yet, just to hold it in place while you level) use spirit level to get stem vertical, then screw/bolt all fixings firmly in place.
4. Open up the N.S.E.W. and push the Lock Washer down into position to form the cross.
5. Use a spirit level to ensure that the support stem is straight and upright. Now Screw the bottom plate of the stem firmly to your fixture using non-corrosive screws or bolts.
6. Slide on the NSEW to rest on the support stem. Use a compass to find north, aim to the correct position and firmly tighten off the lock bolt.
7. Before sliding on the top section, apply some grease to the axle.
Important: The ball bearing must slide up inside the axle to rest on top of the shaft, this will reduce wear and ensure smooth movement.
SHIPPING & INTERNATIONAL ORDERS: Free shipping New Zealand wide - for international orders please get in touch.
Shipping
New Zealand customers: We ship most products to NZ addresses by tracked Courier Post. Allow 2-6 working days for receipt of goods. Larger items may be sent direct from supplier.
International customers: Products featuring an "Available for International Delivery" icon are available to be shipped to Australia, Canada, UK and USA with NZ Parcel Post or DHL.
Visit our Shipping & Returns page for more information.
Returns
All of our products have been thoroughly tested in the marketplace. If, however, you are not happy with any aspect of your purchase, you can return it within 30 days of the purchase date, provided it is unused and in the original packaging, with no questions asked. May exclude sale or end of line items as clearly indicated at time of purchase. Visit our Shipping & Returns page for more information.


Shipping & Returns
Shipping
New Zealand customers: We ship most products to NZ addresses by tracked Courier Post. Allow 2-6 working days for receipt of goods. Larger items may be sent direct from supplier.
International customers: Products featuring an "Available for International Delivery" icon are available to be shipped to Australia, Canada, UK and USA with NZ Parcel Post or DHL.
Visit our Shipping & Returns page for more information.
Returns
All of our products have been thoroughly tested in the marketplace. If, however, you are not happy with any aspect of your purchase, you can return it within 30 days of the purchase date, provided it is unused and in the original packaging, with no questions asked. May exclude sale or end of line items as clearly indicated at time of purchase. Visit our Shipping & Returns page for more information.


Reviews


