

Posted by by the Gubba Team
5th Aug 2019
Bokashi Composting - How to create the perfect Bokashi
In this article: Bokashi - What do you need?, Bokashi - Getting Started, Bokashi - How long does it take?, Bokashi Systems available at Gubba
Bokashi composting - while still relatively new to the composting scene in New Zealand homes, has been around for centuries in Japan. The fundamental difference - and a huge benefit for home composting - is that the method uses beneficial microbes to ferment decomposing food scraps, rather than allowing them to decay and rot like a compost heap does.
In short, that means a wider range of kitchen scraps can go into the compost - including meat, fish and dairy, there's no nasty rotting smells and pests are kept at bay. It can even be done indoors, and it's much faster than traditional composting! If you want to read more about the benefits of Bokashi Composting check out our blog article: Bokashi - from kitchen to compost in a matter of weeks!
But let's dive into the topic of creating the perfect Bokashi compost - what to add, what to leave out, and most importantly what to do with all the Bokashi goodness you get from the composting process!
Bokashi Bins - what do you need to get started?
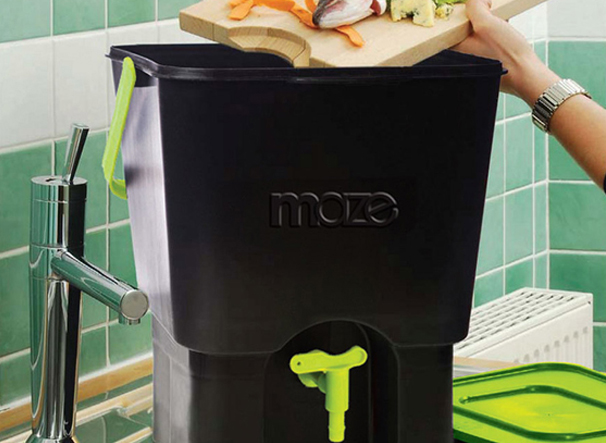
You can easily DIY a Bokashi system of your own using a couple of buckets, but we quite like the compact, portable (and good looking) Bokashi kits in our range that are ready to purchase and ideal for indoor use. Check these out here.
In essence, a Bokashi system uses two buckets - one bucket on top of another. The top bucket has holes in the bottom to allow for compost juices to drain off, and it must also have a lid. Bokashi is an anaerobic composting method, it does not require air to decompose the food waste, therefore no requirement for aerators or "turning the heap". But a good, tight-fitting lid is essential to keep the airflow (and fruit flies) out.
Another handy item is a compactor or masher - several of our Bokashi kits come with a compactor, otherwise a spoon, small plate or potato masher does the job just as well. This is used to press down the food scraps after each addition and get the air out between the layers.
EM - the key ingredient to Bokashi
The crucial step to creating quality bokashi is the addition of "EM" - Effective Microorganisms. These diverse, cultures of beneficial and naturally-occurring microorganisms include bacteria, yeasts and fungi, and it's the combination of these that make it so effective.
In agriculture, EM has wide use for improving soils, boosting crops, pest and odour control and even restoring water quality. When included in Bokashi in the form of a sprinkle or spray, EM accelerates the decomposing process and also adds valuable microbes to the soil when the compost is dug in, adding vital nutrients and improving soil condition.
So what difference does that make?
This is the clever bit! You can put a wider range of waste into your compost - including meat, fish, dairy, bread, some fats, citrus, onions and garlic! This helps eliminate some of the challenges faced with composting at home. Not all compost systems are a perfect all-round solution and worm farms certainly can't cope with the additions of citrus and onions, and adding meat or cheese to your compost pile would create a great stink and attract mice and rats. By no means is Bokashi a silver bullet, but it does do a much better job of recycling proteins, is much quicker and takes up a lot less space.
Getting started with your Bokashi
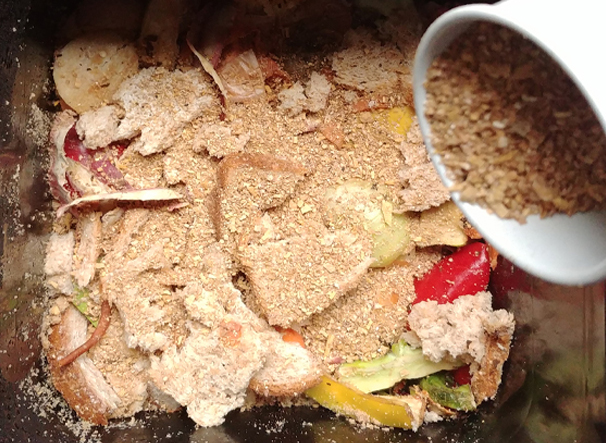
All you need to get going is a bokashi bin (we recommend 2 bins for continuous composting) and some EM, which comes in the form of a bran or a liquid spray. To get started, simply add your first layer of food scraps to the bin and and give it 2-3 sprays (if using liquid spray) or sprinkle a few tablespoons of bran on top. Make sure the lid is secured tightly! Compact the waste down & add more bran / liquid bokashi each time you add a new layer of scraps.
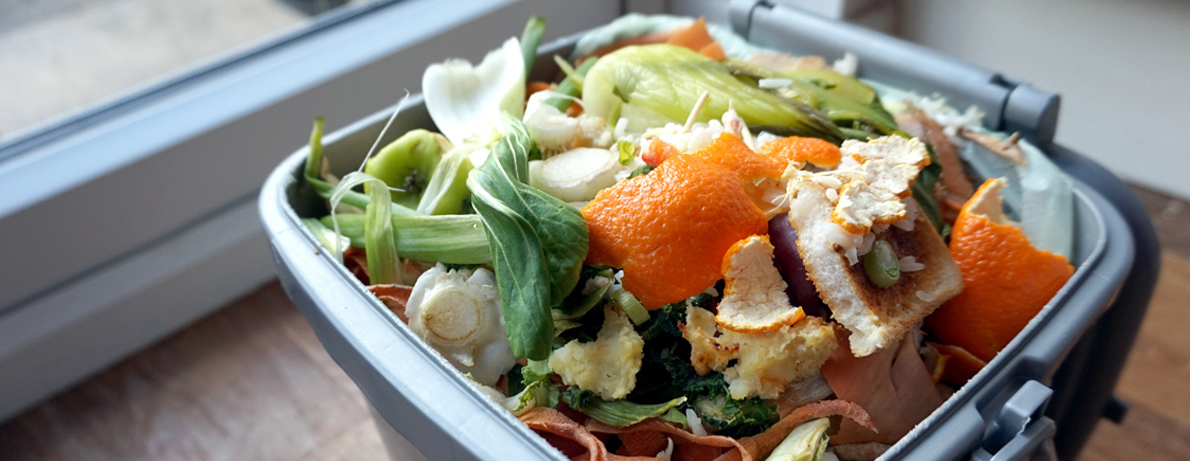
What to add:
- Meat, fish, chicken - both raw and cooked
- Vegetables and fruits including citrus, onions, garlic
- Eggs, eggshells, small bones
- Bread
- Cheese
- Food with white mould
- Some fats - ie salad dressing on salad
- Coffee grounds, tea leaves and tea bags
- Wilted flowers
What to leave out:
- Liquids - oils, milk, fruit juices and no deep-fryer fats
- Large meat bones
- Foods with green or black mould
- No regular compost “browns” like leaves, sticks, cardboard, paper
- Definitely no plastic packaging!
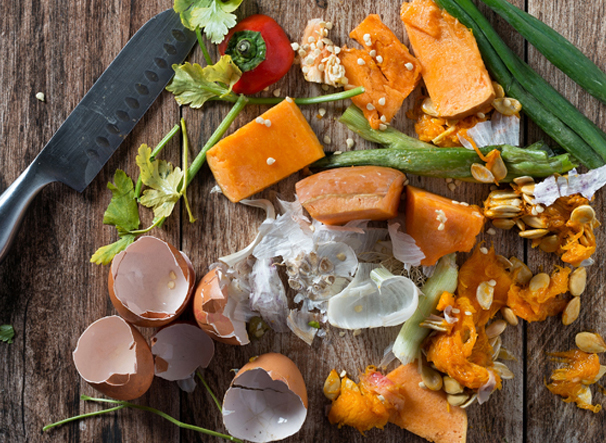
Top tip: Cutting food scraps up into smaller pieces will help them break down more quickly. It also means you’ll be able to better compact down the scraps in your Bokashi Bin, removing more air pockets in between the layers of scraps.
You can leave your Bokashi bin in an out-of-the-way corner of your kitchen, pantry, laundry or garage, as long as it’s in a warm spot out of direct sunlight. The handiest way to collect scraps is a bowl or benchtop kitchen caddy and empty them into your Bokashi bin at the end of each day.
After the addition of each layer of food grab your compactor or masher - this is the best bit - and squish down all the food. There's such satisfaction in that! You want to aim to remove as much air from the scraps as possible. Next, add a couple of tablespoons of Zing sprinkle, or a couple of sprays of Bokashi liquid and pop the lid back on tightly.
How long does Bokashi take?
A 15-18 litre Bokashi Bin will take a regular family of four 1-2 weeks to fill depending on the volume of scraps generated. During the process, your compost solids are quietly fermenting in the top of the bucket, and a nutrient-rich compost juice is draining into the bottom bucket. The amount and colour of the liquid depends on the scraps that have been added - fruit and vegies produced more liquid than other scraps.
This liquid gold is an outstanding fertiliser but incredibly potent. It must be well diluted with water at a ratio of 1:100 that's only 2-3 tablespoons per 5 litres of water, and can then be liberally applied to the soil around plants. Avoid applying directly to the foliage or roots.
Most interestingly, the liquid can also be poured undiluted down the toilet, shower drain, sink, outdoor drains and septic systems as all the goodies it contains help prevent algae build-up and odours. Wow! It's super important to drain your liquid off every few days to avoid it turning rancid and nasty, and don't worry if you see white mould growing on top, that's a really good sign that everything's working as it should. Our Maze Bokashi systems have a handy tap for draining this off.
Handy hint: In warmer weather, or if you've added meat, cheese or bones, add a couple more scoops of sprinkle or sprays to ensure effective fermentation and avoid nasty smells.
So the Bokashi Bin is full - what next?
Once the bin is full, the lid is secured tightly and left for 10-14 days to ferment. Your food waste should have a sweet pickled smell - sometimes even a pleasant malty aroma - but definitely not nasty. Now you're left with your solid compost product and it's time to get digging. Find a clear space in your garden, away from tree and plant roots and dig a trench at least 20-25cms deep and twice as wide. Pour in your solids and cover back up with the soil.
Unlike traditional composting your Bokashi waste still retains it shape and volume, so don't be surprised if it looks just like it did when you added it to the bucket. If the surrounding soil is a little dry, add some water to aid the composting process. When combined with the soil in your garden, the Bokashi solids (which are quite acidic to begin with) will neutralise, and the bacteria in the soil and waste will start to break down the scraps. This is where the magic happens! Depending on climate conditions and temperature it will take about 7-10 days for the solids to neutralise and approximately 3-4 weeks to turn into a lush compost your can plant directly into.
Don't have space to dig a trench - don't despair!
Sometimes finding a space in your garden to bury the Bokashi can be the trouble, but you can get clever with your waste. It makes an excellent addition to your regular compost bin, simply as a "green layer" and top with a bit of soil or a layer of "browns". You can also set up a larger planter box or tub with soil, and simply bury it in this. As long as it has a good covering of soil it will break down the same.
What do you do with your kitchen scraps when your bucket is full?
We strongly recommend the use of two or more Bokashi bins. When one fills and is minding its business in the corner, you can start on the next one. If you're really into composting and have space at home, Bokashi is super useful as an additional composting method to worm farming and traditional compost bins.
One you make the initial investment of the right number of bins for your family, the only ongoing purchase commitment is for Bokashi sprinkle or spray. The 1kg CompostZing bags should last 2-3 months and the Maze Liquid Bokashi 500ml sprays will last 1-2 months, when used following instructions and dependent on how much scraps you are generating.
Here's what one of our Gubba team members recommends: "I've got a Zingbokashi composting system at home using 2 units. I actually use this in addition to having a worm farm and chickens, as our household with young kids generates plenty of food scraps, and this system is complementary allowing me to compost a wider variety of waste. We have a little benchtop caddy that we put scraps in through the day, then transfer it to the bin each night. The ZingBokashi buckets are kept in the garage, there is no smell and it's super easy to use. The smell of the CompostZing is actually quite pleasant. There's also a bit of therapeutic stress relief in squishing down the scraps with a potato masher!" - Emma
Voila! That's Bokashi!
And so there you have it! Everything you need to know to get the perfect Bokashi underway...now to decide which composting system you want to buy!


