
Posted by Elly Keen from @daydream.green
24th Aug 2023
How to Propagate Dahlias and multiply your plants for free!
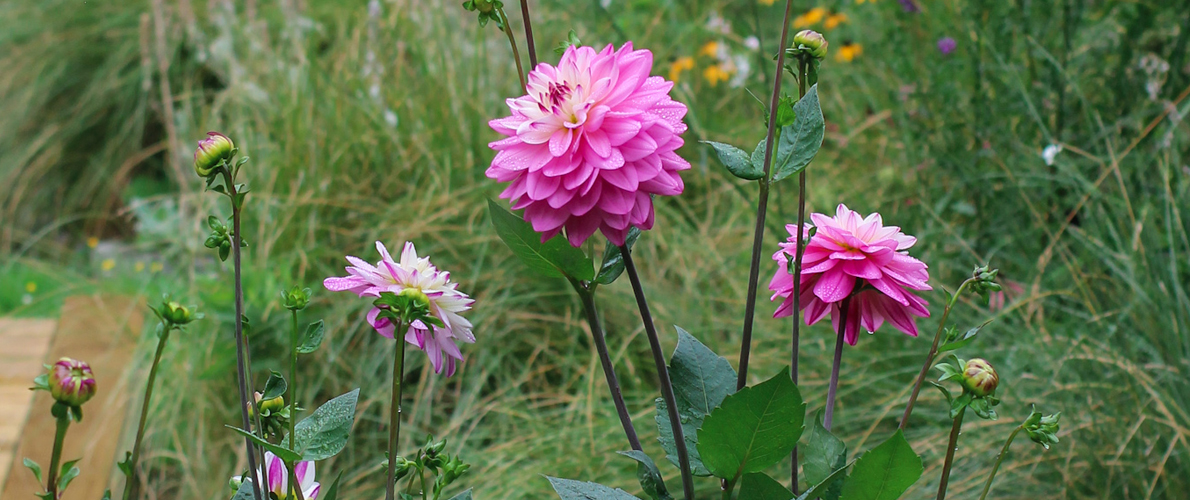
Dahlia flowers may have been considered old fashioned once upon a time, but these days many young gardeners are getting into bidding wars over these bold blooms. The blushy diva Cafe au Lait started the trend with brides-to-be, leaving florists and farmers flapping to keep up with demand. Now the everyday gardener is getting on board, and there seems to be no other flower that has captured our hearts quite like the dahlia has.
Garden dahlias are unique in the flower world as they have the ability to come in such a range of colours and shapes. This is due to the fact that dahlias are octoploids, meaning they have eight sets of chromosomes, whereas most plants only have two. This great diversity has generated a collector's phenomenon among gardeners and a corresponding surge in tuber sales.
If you're growing dahlias this year, you may be eager to try propagating them to increase your stock and save yourself some money. I promise it's not as hard or complicated as it seems; there are three main methods to propagate a dahlia, which I will demonstrate in this article.
Propagation from division
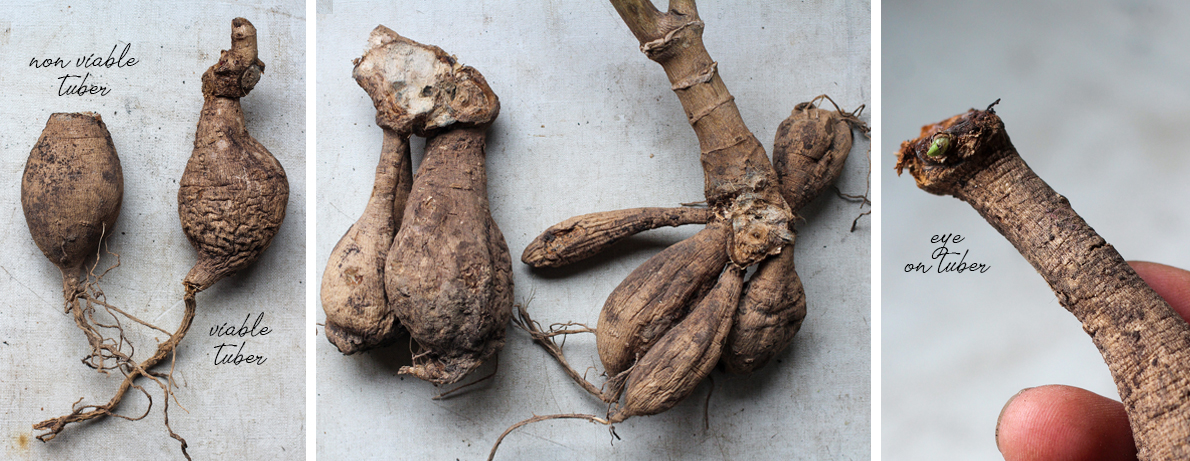
One of the easiest ways to propagate your dahlia is to divide the tubers. This requires you to dig up your dahlia tuber clumps in the winter, once the plant has gone dormant. Carefully lift your clump from the soil and leave it to dry before storing. In the spring, the tubers will naturally begin to 'wake up' with increased temperatures, and the eyes will begin to swell. At this time, you can begin to divide your tubers.
To do this:
- Take your clump of tubers and use a sharp knife or secateurs to divide the clump. You may choose to cut the clump in half, quarters, or even individual tubers.
- Ensure each new clump of tubers or individual tuber has a section of the neck and crown intact. The neck connects the tubers together, while the crown is where the eye is located.
- A new shoot will grow from the eye, and if you are missing the neck or the crown from your division, it will not be viable. This is why dividing in the spring is the preferred option, as the eyes become more prominent and easier to see.
- Plant the tuber directly in the garden after the first frost or pre-sprout in potting mix.
Propagation by Cutting
The next way to propagate dahlias is by taking stem cuttings. Dahlias grown from cuttings will flower and form a new clump of tubers by the end of the season. Most competition show dahlias are propagated from stem cuttings, as it is much easier to control their growth when compared to a tuber propagated dahlia. The colour and vibrancy of the flower are said to be more intense when grown from cuttings.
To do this:
- Take your clump of tubers or an individual tuber and lay them flat in a tray or pot. Cover with an aerated soil mix with added grit (pumice, sand or perlite).
- Dampen your soil mix but make sure it is not soaking wet. The tubers are prone to rotting and do not have the ability to use water until they grow roots and leaves.
- Place the tray indoors in a warm spot until the eye begins to sprout, this could take up to three weeks for some varieties. Check the moisture of the soil frequently. You can water lightly if it becomes too dry, but generally you will not need to water until the new shoot emerges.
- Once the shoot forms at least three sets of true leaves, you can take your cutting. Using a sharp pair of scissors, snip the stem at the base of the tuber.
- Remove the bottom set of leaves from your cutting, this is where the roots will grow.
- Dip in a rooting hormone if preferred, and place inside a pot using a cutting mix (potting soil with added grit).
- Water and place a clear bag over the top of the pot to keep up humidity and prevent the leaves from wilting.
- Leave in a warm area out of direct sunlight and keep moist. Your cutting should root in four to six weeks. During this time, it is important to be patient, I know it can feel tempting to pull the cutting out to see if roots have formed, but you could cause damage by doing this. Instead, check at the bottom of the pot to see if you can spot any roots.
- Once roots have formed, you can transplant the cutting to grow on before planting it in the garden.
Propagation from seed
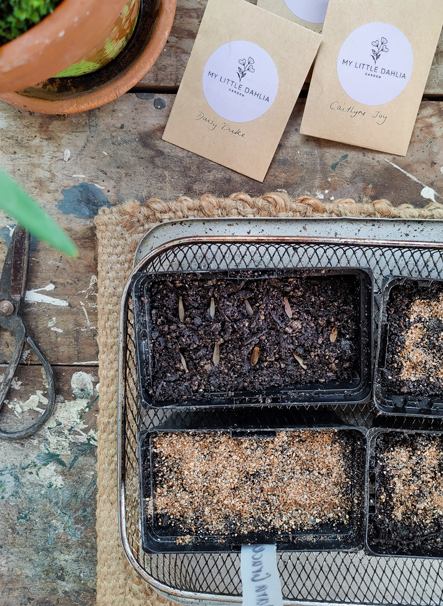
Finally, there is propagation by seed. This has become an increasingly popular way to propagate dahlias thanks to flower farmer and breeder Erin Benzakein of Floret Farm, who has made information accessible and fun. Seed propagation will give you a brand new hybrid variety every time, and while some plants grown from seed may carry traits from the parent, this isn't a guarantee, and they can end up looking completely different. The added bonus of seed propagation is that it can be a cheaper option when compared to buying tubers.
To do this:
1. Harvest dahlia seed heads in autumn once they turn brown and dry, or alternatively, purchase a packet of seed.
2. Sow directly on top of a good quality seed raising mix and sprinkle with a light layer of vermiculite, as dahlia seeds require light to germinate.
3. Place in a warm position indoors or on a heat mat until germination occurs, which should take 10–14 days.
4. Once germinated, carefully prick out seedlings into individual pots to grow on until established enough to be transferred into the garden in late spring.
5. Keep pots protected from frost as seedlings are tender.
I hope you feel inspired to propagate your dahlias this spring. I'm sure you will be surprised by how little time and effort it takes to produce so many dahlia plants for you to enjoy in the garden. Happy propagating, friends!
Thank you to Elly Keen @daydream.green for writing this blog for Gubba